3D Printing – Second Stage
So, after my previous attempts worked relatively well, I’m onto the major project. This is Octarius inspired Ork-ish Kill Team terrain, which will include components for my Display boxes, as well as items that I can combine with my village terrain.
So the focus is on some base components, that can then be used multiple times in the project.
Girders

Flooring

List of components and status:
These are the items that need to be made in order to assemble the basic ramshackle buildings with, and the status of the designs shown above.
Wall Sections:
- Big Girder with Centre Rivets – 85%
- Big Girder with centre holes – 85%
- Medium Girder with Side Rivets – 85%
- Decorative Teef 1 – 100%
- Decorative Teef 2
- Decorative Teef 3
- Small Square Grill
- Small Girder – Side Rivets
- Small Girder – Centre Rivets
- Sideways Girder Protrusions
- ‘Straps’ – Shared with Floor
- Small square vent
- Angled wall support – Double rivets
- Angled wall support – Large rivets
- Tank 1
- Tank 2
- Hatchway door 1
- Hatchway door 2
- Broken control panel 1
- Broken control panel 2
- Gothic floor panel 1 – 85%
- Gothic floor panel 2
- Decorative Panel 1
- Decorative Panel 2
- Decorative Panel 3
- Decorative Panel 4
Floor Sections:
- Mesh plate – 100%
- Checkplate – 100%
- Double Checkplate – 70%
- ‘Straps’ – Shared with Wall
- Solid square access hatch
- Circular access hatch
- Oval grills
- Electrical connector 1
- Electrical connector 2
- Gothic floor panel 1 – 85%
- Gothic floor panel 2
- Exhaust fan
- Flat panel 1
- Flat panel 2
- Flat panel 3
Kill Team Week Two Review
So, after starting the Kill Team project, what have I accomplished in the second week?
The multi-stage project has a few parallel activities, and I am happy to say that most of them progressed through the week!
| Activity | Week 1 | Week 2 | Week 3 | Week 4 | Week 5 | Week 6 | Week 7 | Week 8 | Week 9 |
| 1. Kommandos Kill Team | |||||||||
| 1.1 Assembly | 100% | ||||||||
| 1.2 Basecoat | 5% | 85% | |||||||
| 1.3 Detail Painting | |||||||||
| 1.3.1 Bomb Squig | 50% | 90% | |||||||
| 2. Kreig Kill Team | |||||||||
| 2.1 Assembly | 100% | ||||||||
| 2.2 Locate Auxiliaries | 100% | ||||||||
| 2.2.1 Assemble & prime Auxiliaries | 100% | ||||||||
| 2.3 Basecoat | |||||||||
| 2.4 Detail Painting | |||||||||
| 3. Hive Fleet Kill Team | |||||||||
| 3.1 Find models | 100% | ||||||||
| 3.2 Assemble | 10% | ||||||||
| 3.3 Basecoat | |||||||||
| 3.4 Detail Painting | |||||||||
| 4. Terrain | |||||||||
| 4.1 Starter Set Box terrain | |||||||||
| 4.1.1 Assemble | 100% | ||||||||
| 4.1.2 Paint | 25% | ||||||||
| 4.2 Village Set | |||||||||
| 4.2.1 Experiment with textures | 100% | ||||||||
| 4.2.2 Texture Village | 40% | ||||||||
| 4.2.3 Paint Village | 40% | ||||||||
| 4.3 Village Supplements | |||||||||
| 4.3.1 3D Print Prototypes | 50% | ||||||||
| 5. Display Boxes | |||||||||
| 5.1 Design boxes | 100% | ||||||||
| 5.2 Build Basic Boxes | 5% | ||||||||
| 5.3 Detail Boxes | |||||||||
| 5.3.1 Detail Kommando Box | |||||||||
| 5.3.2 Detail Kreig Box | |||||||||
| 5.3.3 Detail Tyranid Box | |||||||||
| 5.4 Paint Boxes |
This post is a bit late! I’m almost through week three already at this stage. Oh well.
Kill Team Week One Review
So, after starting the Kill Team project, what have I accomplished in the first week?
The multi-stage project has a few parallel activities, and I am happy to say that all of them progressed through the week!
| Activity | Week 1 | Week 2 | Week 3 | Week 4 | Week 5 | Week 6 | Week 7 | Week 8 | Week 9 |
| 1. Kommandos Kill Team | |||||||||
| 1.1 Assembly | 100% | ||||||||
| 1.2 Basecoat | 5% | ||||||||
| 1.3 Detail Painting | |||||||||
| 1.3.1 Bomb Squig | 50% | ||||||||
| 2. Kreig Kill Team | |||||||||
| 2.1 Assembly | 100% | ||||||||
| 2.2 Locate Auxiliaries | 100% | ||||||||
| 2.3 Basecoat | |||||||||
| 2.4 Detail Painting | |||||||||
| 3. Hive Fleet Kill Team | |||||||||
| 3.1 Find models | 100% | ||||||||
| 3.2 Assemble | |||||||||
| 3.3 Basecoat | |||||||||
| 3.4 Detail Painting | |||||||||
| 4. Terrain | |||||||||
| 4.1 Starter Set Box terrain | |||||||||
| 4.1.1 Assemble | 100% | ||||||||
| 4.1.2 Paint | 25% | ||||||||
| 4.2 Village Set | |||||||||
| 4.2.1 Experiment with textures | 100% | ||||||||
| 4.2.2 Texture Village | |||||||||
| 4.2.3 Paint Village | |||||||||
| 4.3 Village Supplements | |||||||||
| 4.3.1 3D Print Prototypes | 50% | ||||||||
| 5. Display Boxes | |||||||||
| 5.1 Design boxes | 100% | ||||||||
| 5.2 Build Basic Boxes | 5% | ||||||||
| 5.3 Detail Boxes | |||||||||
| 5.3.1 Detail Kommando Box | |||||||||
| 5.3.2 Detail Kreig Box | |||||||||
| 5.3.3 Detail Tyranid Box | |||||||||
| 5.4 Paint Boxes |
Tik Tik the bomb squiq
First actual mini on several years. I always fear that my painting is going to be horrible after a break, and I think I’m always surprised that I haven’t lost too much muscle memory.
This guy got base coated over a single breakfast while supervising my kids getting ready for school. He’s not going to win any painting prizes, but he’s “battle ready” other than the base, in under an hour.
Colours used for the base coat – Castellan Green, Khorne Red, Averland Sunset, Naggaroth Night, Leadbelcher, Celestra Grey, Dryad Bark, McCragge Blue, Zandri Dust, and a whole body wash with Nuln Oil.


Experimenting with textures fit terrain and bases
Long term project that I have only just gotten around to is experimenting with textures that can be created with the cheap gap filler that I buy. First target is the building kit that I need to make look a bit more concrete-y before painting, with a secondary goal of seeing what happens and how this stuff behaves in different circumstances.
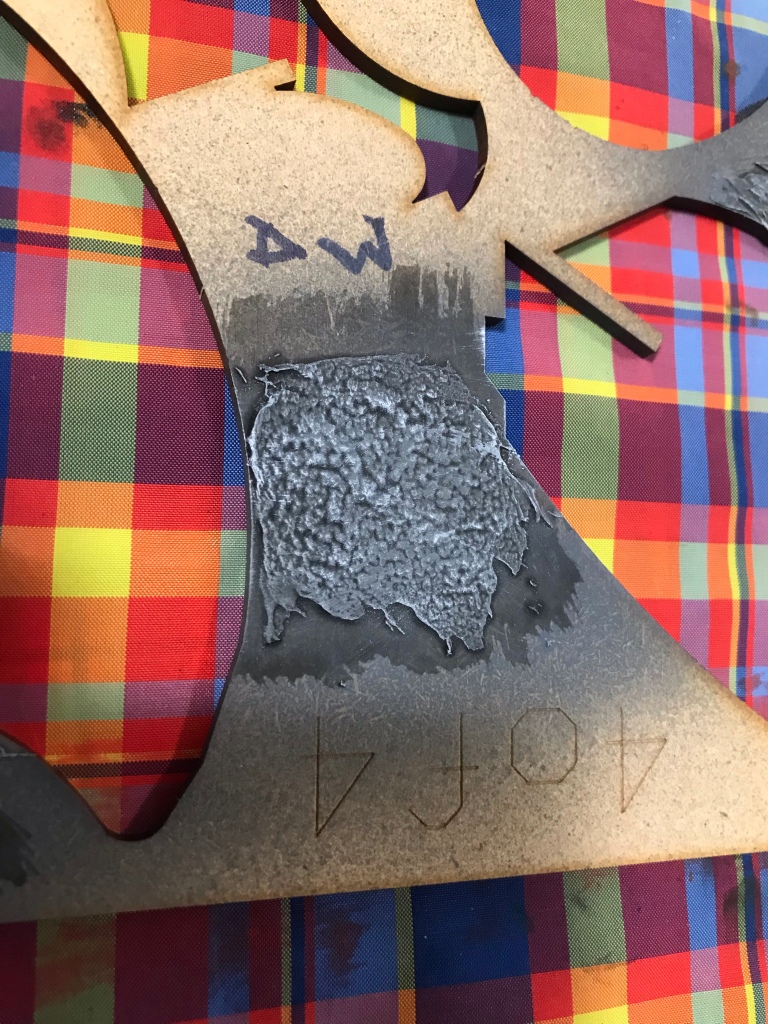
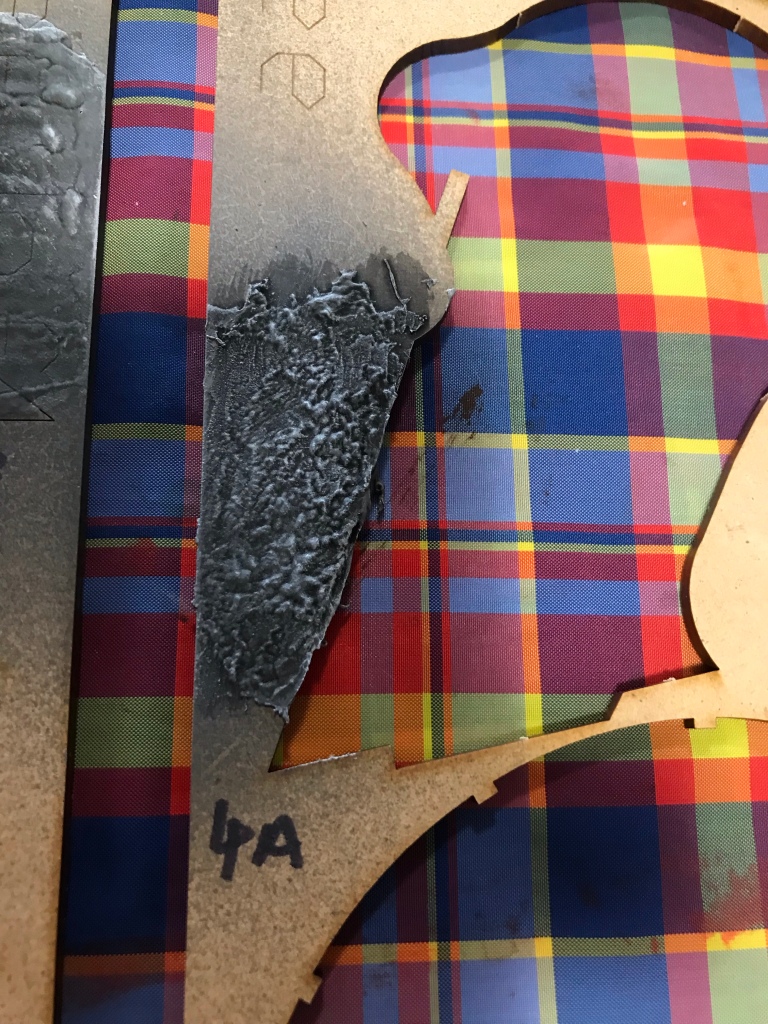
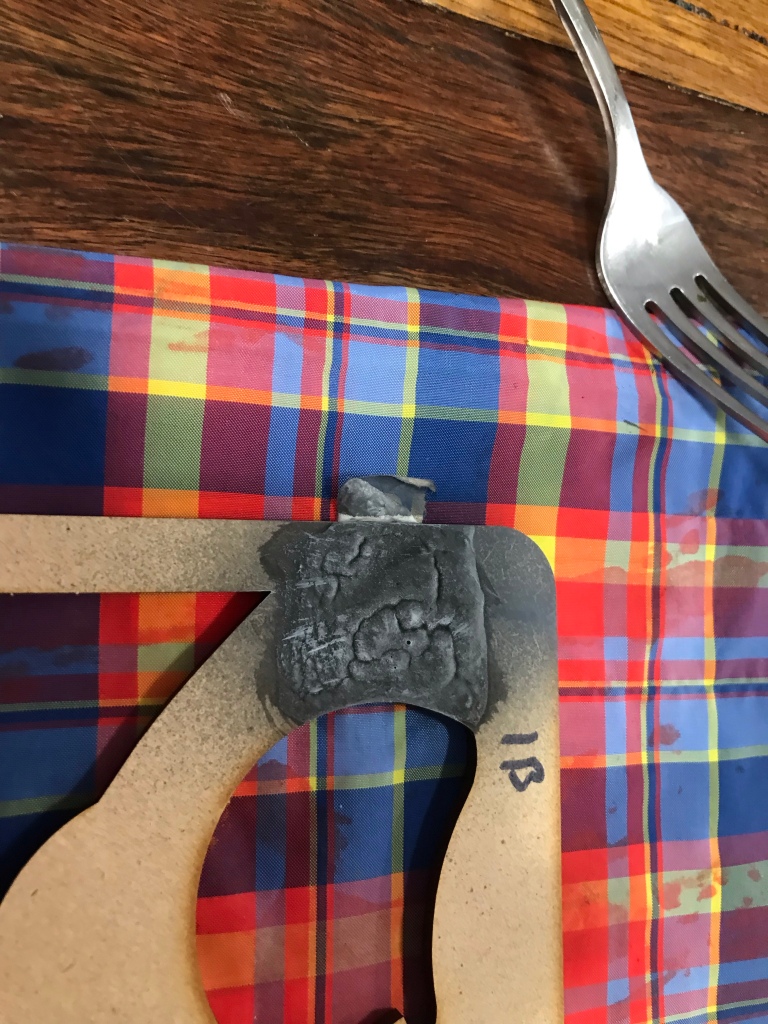
So, I got some old MDF that the terrain pieces have been cut out of, and set aside six spaces on each for the techniques that I wanted to try. Panel A is straight gap filler with no water, panel B is mixed with water. The numbers are the same techniques, which are:
- 1 – Straight application with a paddle-pop stick.
- 2 – Applied with a toothbrush
- 3 – Stippled with a paint brush (‘commercial’ size brush, for rooms, joins, etc – not a hobby or artists brush)
- 4 – Stippled with a toothbrush
- 5 – Stippled with a sponge
- 6 – Stippled with a cloth.
With the plan in place, it was time to apply, let dry and then prime grey.

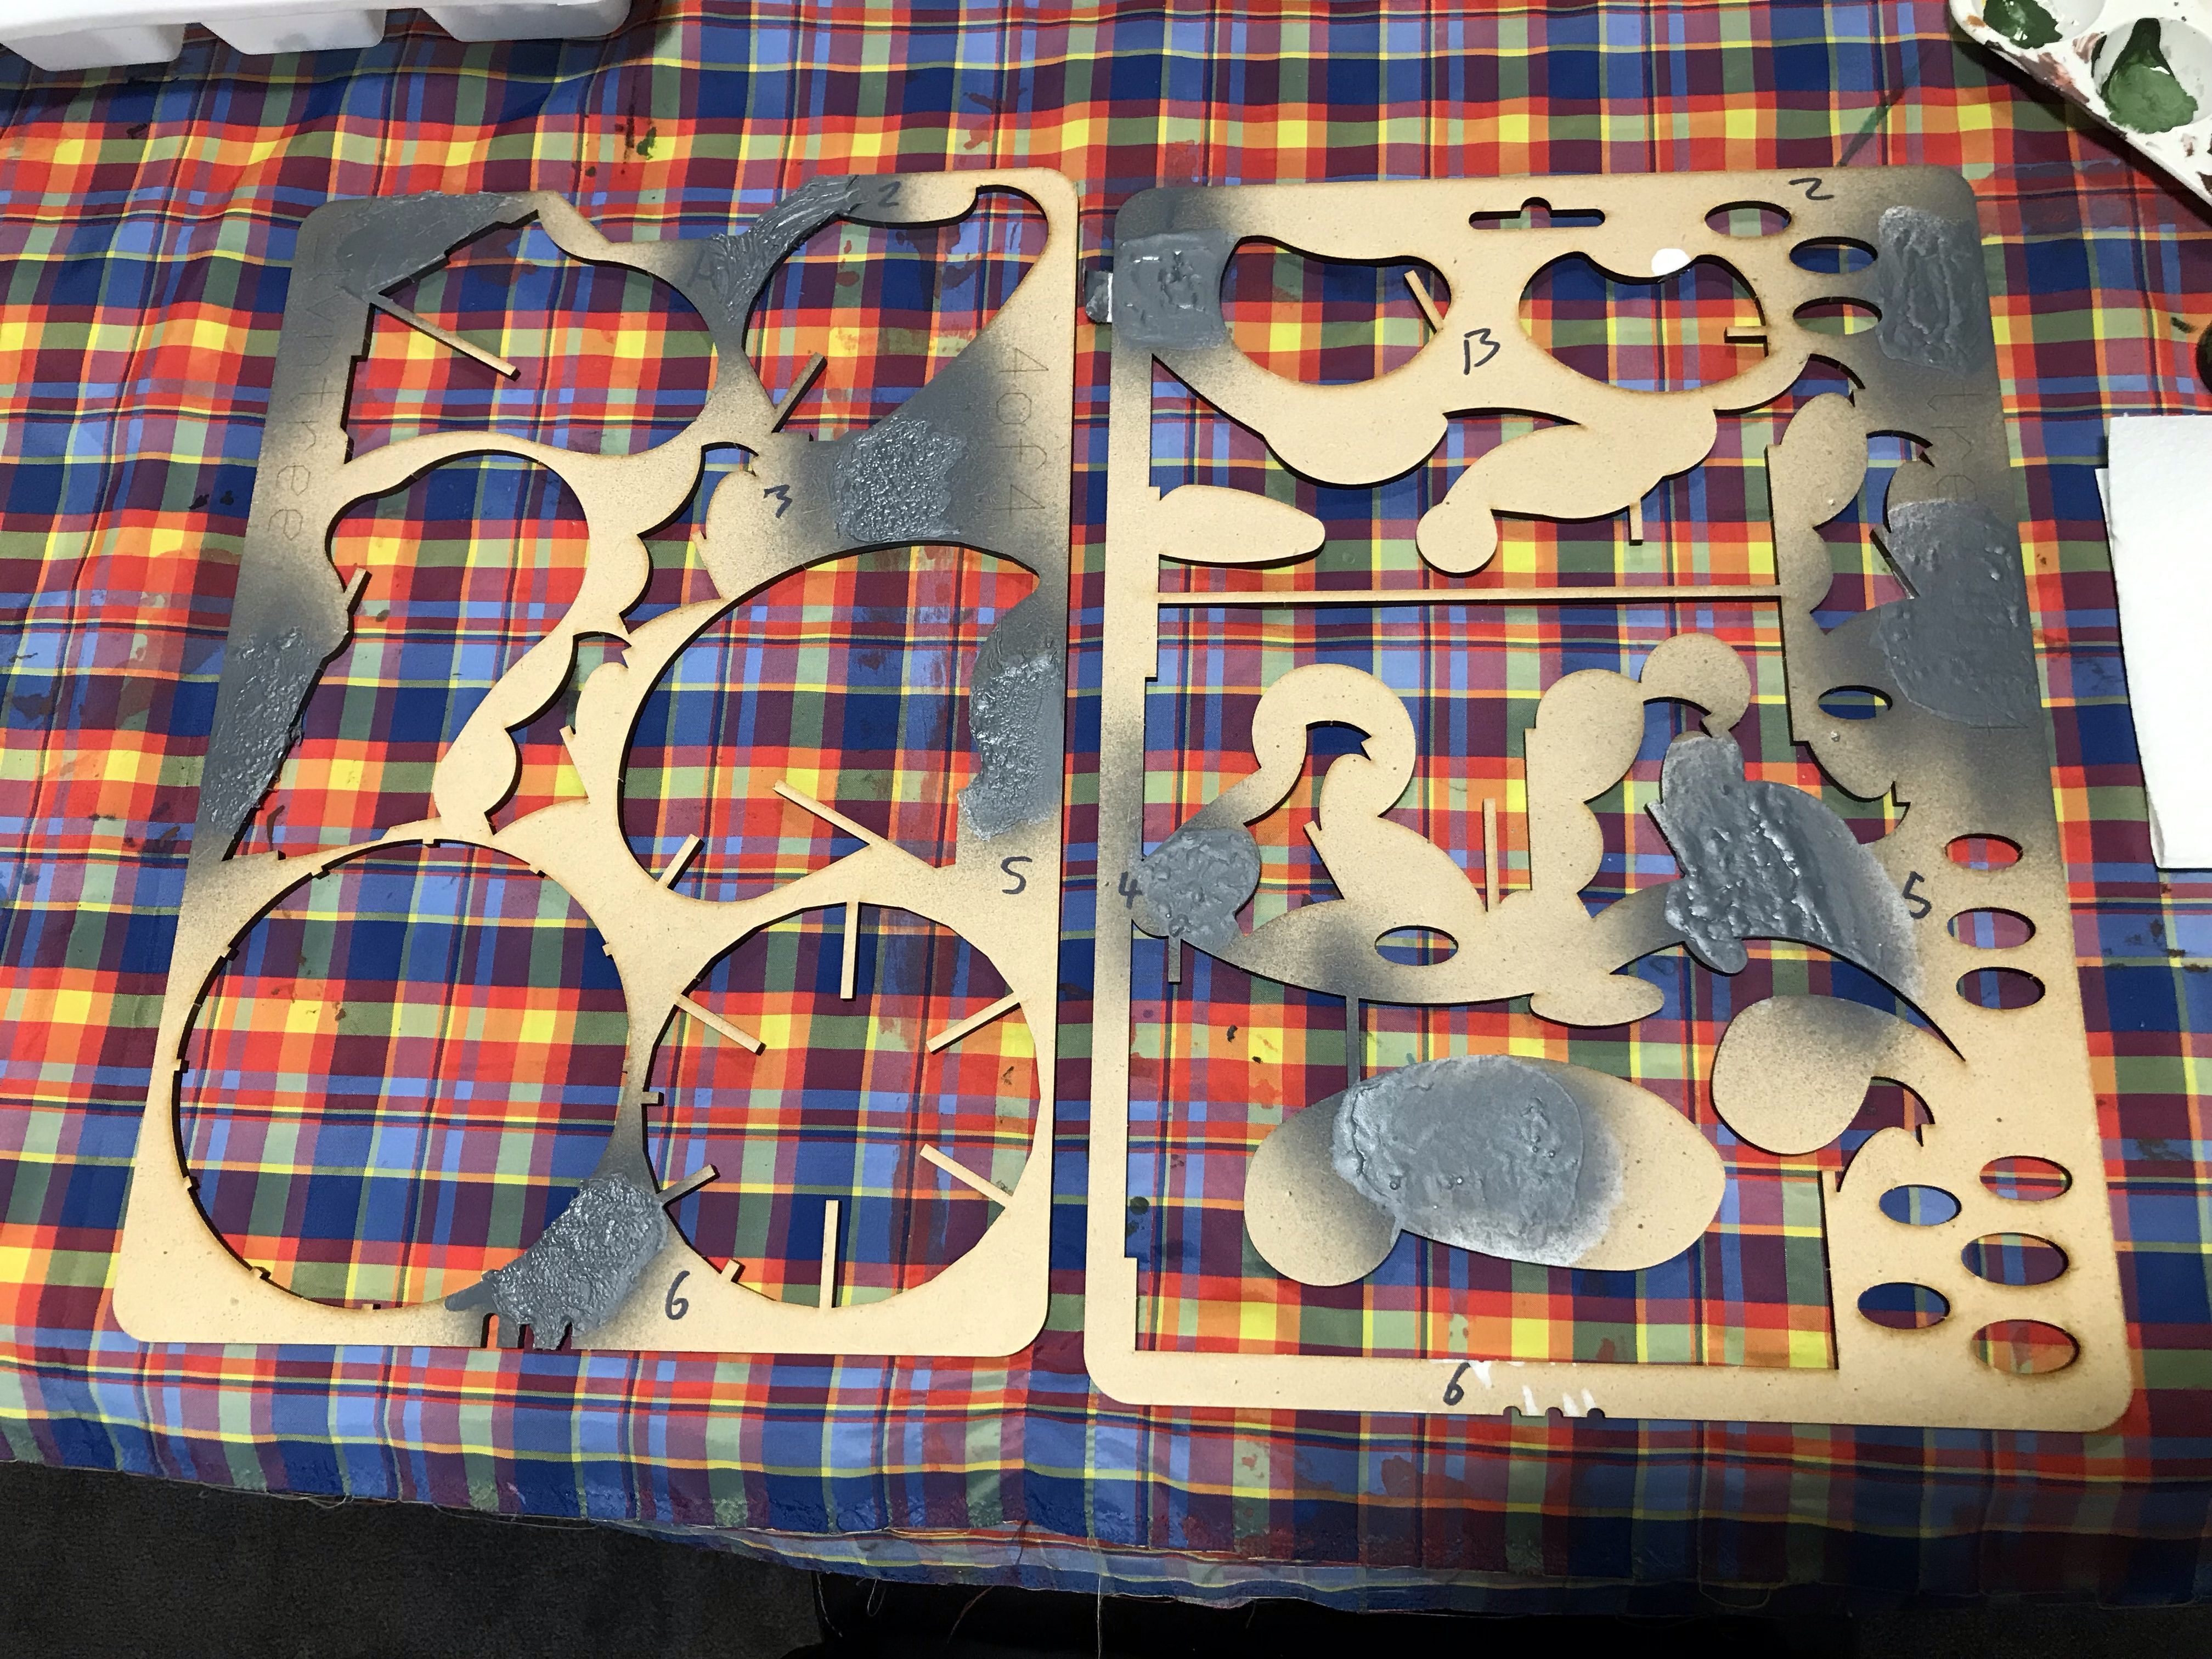
After the priming, it was a wash in Nuln Oil, a dry brush with grey, followed by a light dry-brush with white in order to see what they would look like as terrain or as bases:
Results are – Straight application, undiluted:

Applied with a toothbrush, undiluted

Undiluted, stippled with a paintbrush:
Undiluted, stippled with a toothbrush:
Undiluted, stippled with a sponge:

Undiluted, stippled with a cloth:

Diluted, straight application:
Diluted, application with a toothbrush:

Diluted, stippled with a paintbrush:

Diluted, stippled with a toothbrush:

Diluted, stippled with a sponge:

Diluted, stippled with a cloth:
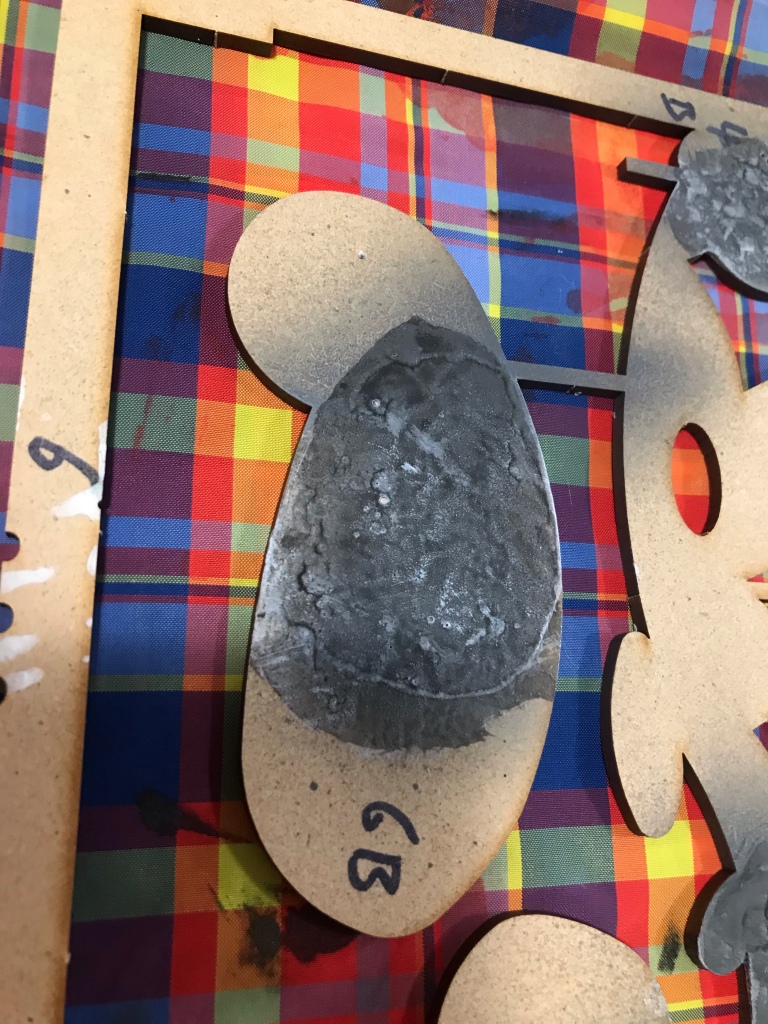
End result was that dilution made most of the results look the same, and carried the texture much worse. However, the effect when it dried with cracking is probably good for bases and some terrain ground cover projects. But it looks like straight application with gentle sponge or cloth stippling is the way to go for the village project.
First 3D Designs – Warband Glyph and First Ork Building Decoration
So, these posts are going to be a bit of a reflection and discussion on what I learned and how I went with this adventure. I use these for my own reference, to look back on what I’ve painted or made and to reproduce techniques – my hobby journal – and they’ll be written like that.
First thing I wanted to do with the 3D printer is to make some Ork terrain pieces and decorations. A while ago I bought a ‘base’ terrain kit (see the post here) with the intent of being able to decorate it for multiple factions in a really straightforward manner. Now that I’ve got the Kill Team project going, getting that terrain done is the second part of the effort (after the Kill Team models themselves).
First part of the journey was to go back to my old Ork Codex that I got second hand many years ago with a batch of second hand Orks circa 2009.
Inside that codex is all the fluff and the glyph lists. I’m sure it’s probably online these days as well, but I like books. After a half an hour of rummaging through the book and my brain, I concluded that Warboss Walkul was probably intended to be some sort of cross between Death Skulls and Bad Moonz, though it’s a bit hard to tell because I only ever painted two models and set up the skeleton of a page on this site.

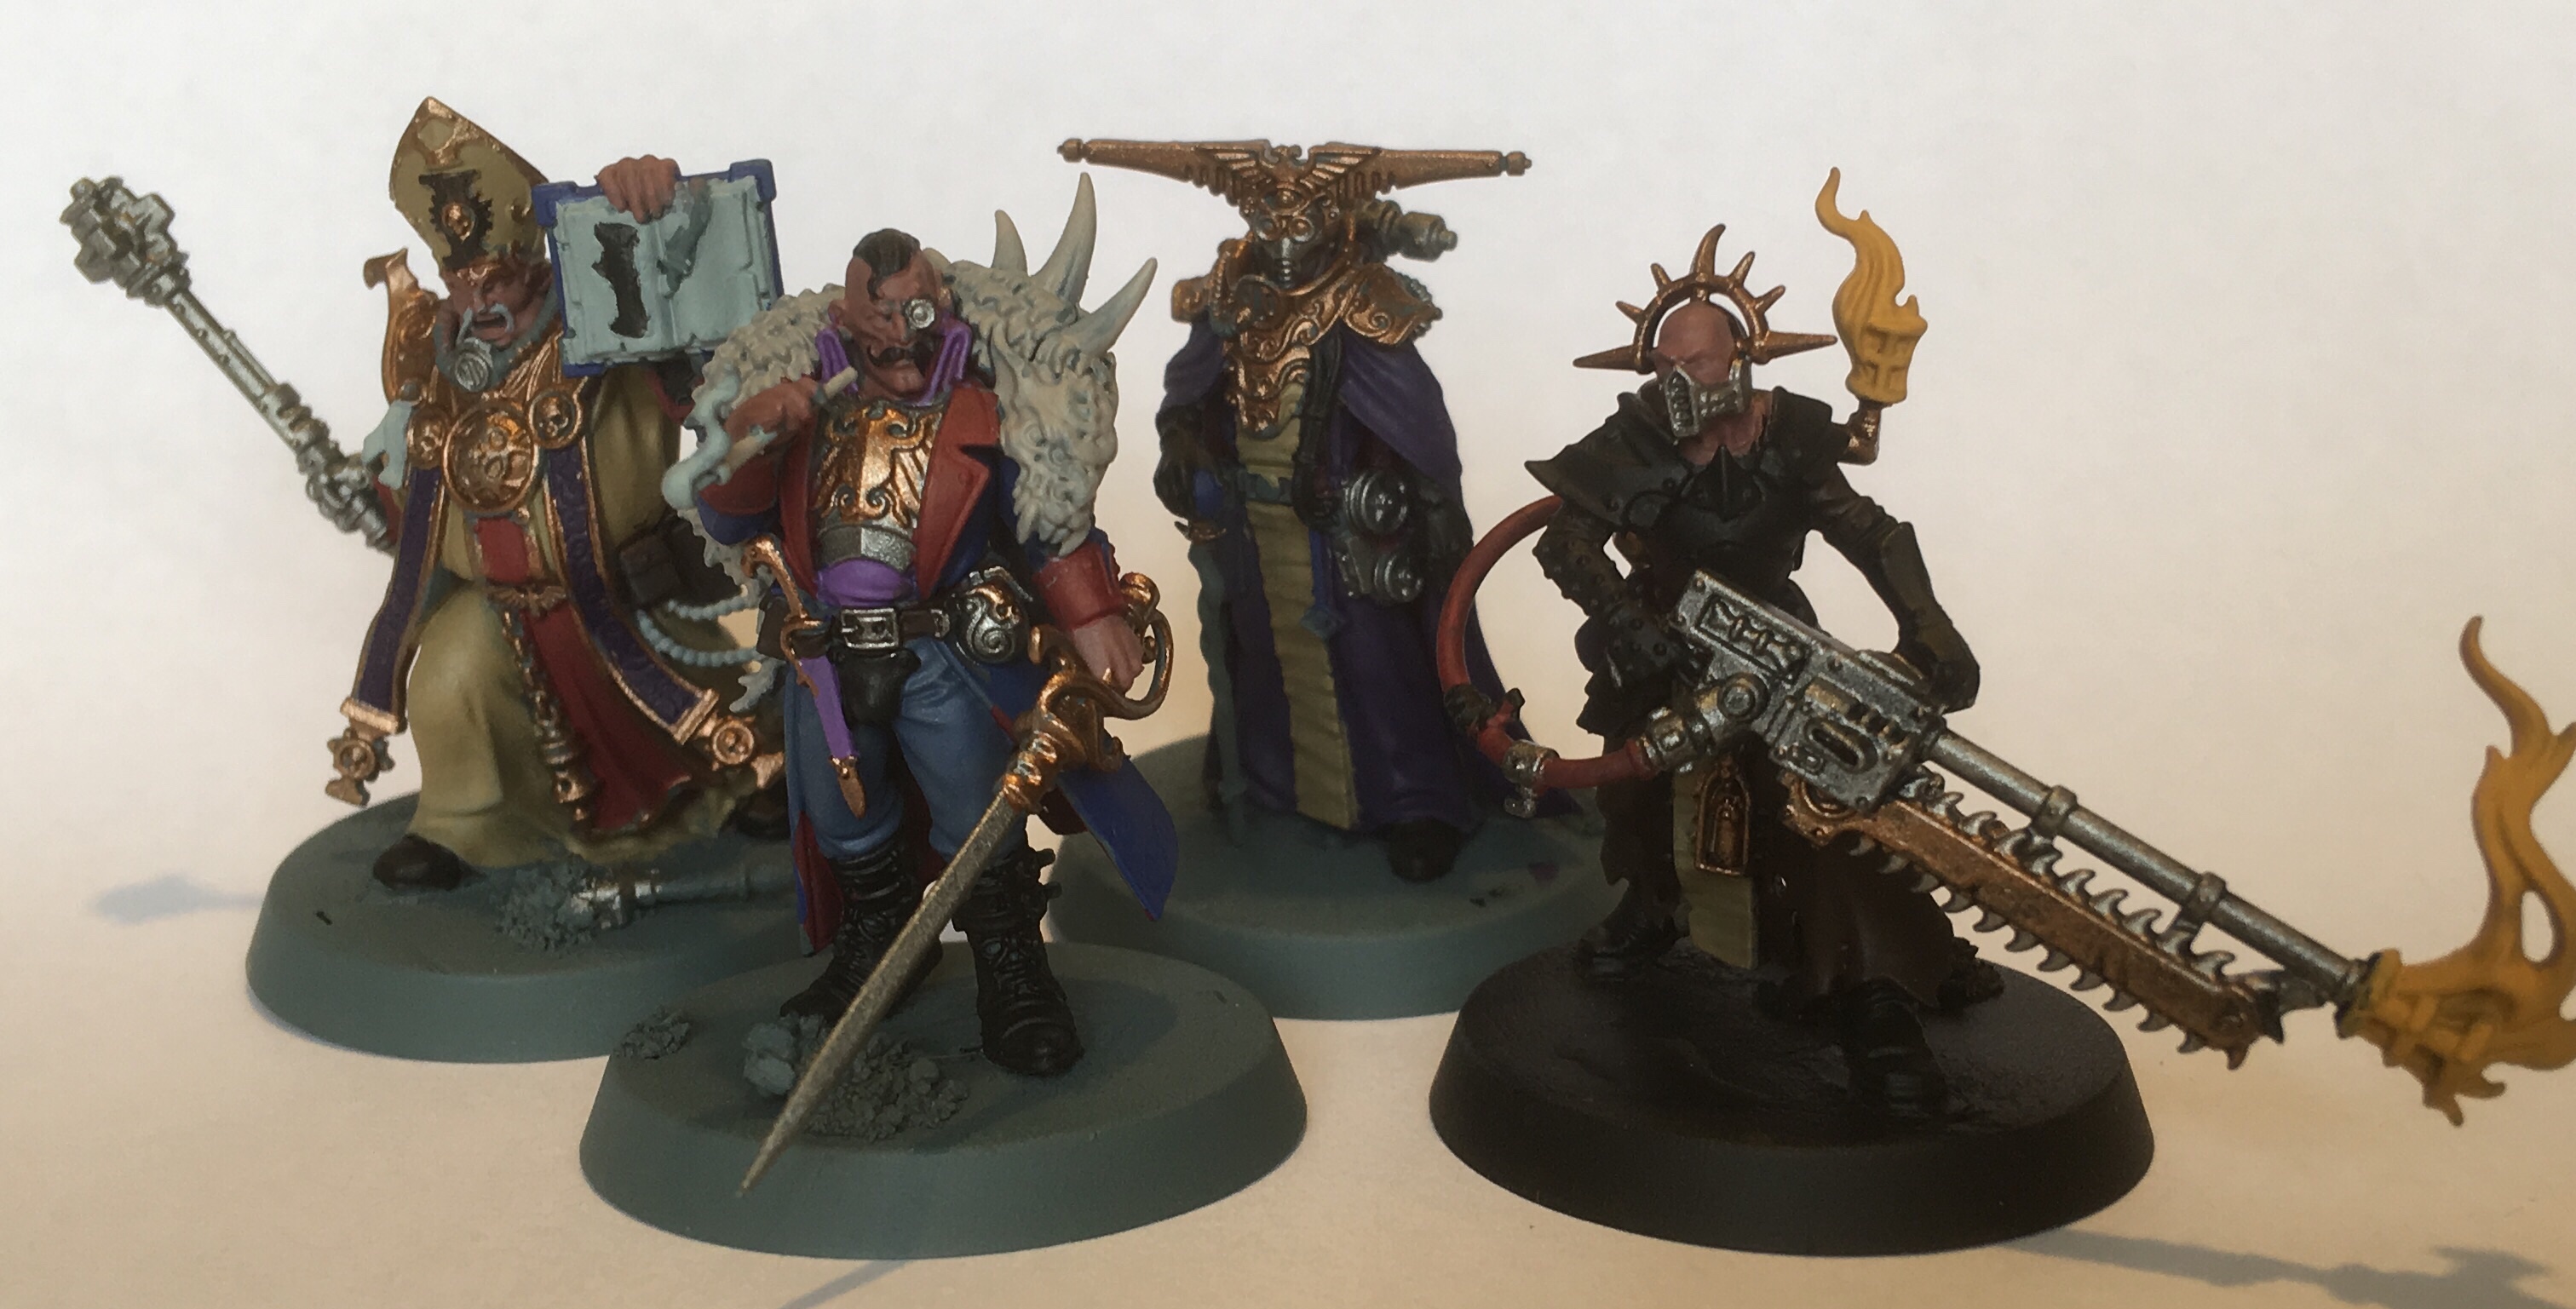
After a bit of fiddling with the book, I settled on Warboss Walkul’s symbol being the skull from the Death Skulls, with a set of flaming hair. The colour scheme is bright blue background, with yellow glyph, as can be seen in the Nob below.

Warband Glyph
After a bit of sketching on paper, I committed to putting everything into Autodesk Fusion 360. At this stage, I’d watched through a very good YouTube tutorial series until roughly episode 6, and done the first exercise myself. Nothing like jumping in blind. I chose to work within a 15mm x 15mm dimension, with the though that looked about what the boss poles look like, and that size should work as a piece that I can place on buildings, etc. Here is what the design looked after an hour or so.

After that, it was time to test the printing to see what it looked like in reality.
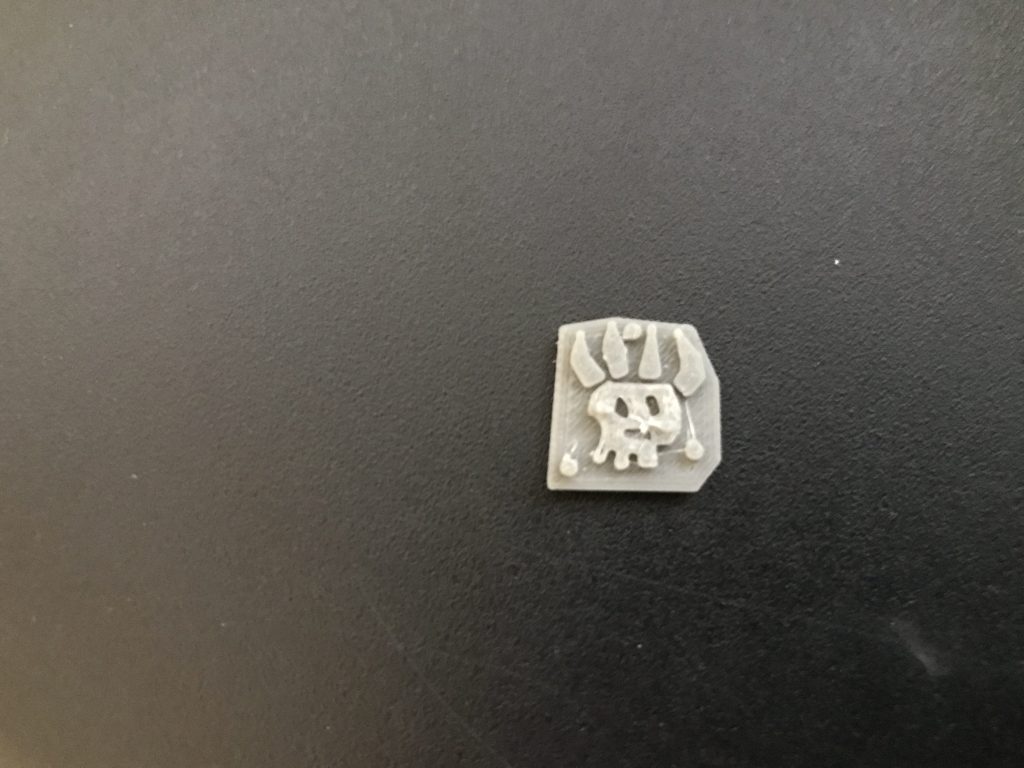
And with a model to show the scale.

So, the model came out pretty much exactly as per the drawing, which was good. Items/thoughts/reflections are:
- The drawing was messy, because they are Orks, but it actually came out looking more messy in reality than I had wanted it to. I’d neaten it up for another version.
- The rivets on the mounting panel are larger than I want, and a lot, lot, larger than those currently used on the GW range of models – which I want this to fit in with. I went with 1.2mm diameter, and an extrusion of 1mm. I think this measure might be ok on very large terrain, but not if the piece will also be used right next to a model.
- The small rivets are ok, at 0.8mm diameter and 0.5mm extrusion. I don’t think my printer would properly build anything much smaller than this.
- I wasn’t sure if the flame hair areas would come out correctly, particularly those with the bends at the end. Overall, they look better, and some more shape in the other two would be better.
- The 1.5mm extrusion depth for the mounting panel looks about right.
- The 1mm extrusion for the glyph features also seems about right. If the rivets were lower, then there would be a fourth ‘level’ in the item, which might make it a better product overall.
- I don’t think the ‘off centre’ eyes worked. Good idea, just less good in practice.
Mind you, for a 6min print that takes 0.48g of plastic, this panel is one that I might use again – if just for some variety.
First Ork Building Piece
So, the pieces are all designed to be used with other items, not in their own right. the two items in the list are the Gallowdark inspired blank walls here on Thingverse, as well as the previously mentioned mdf terrain kit. There is a third intended plan later – but I need to get further through the basics first!
So, the design rules were: 1. Flat (or nearly flat) back, to enable mounting to other pieces. 2. Within the theme/vibe of the Kill Team Ork terrain, to make a consistent image.
After searching through the books again, and gazing at the unpainted terrain features, I settled on a few items in the Ork junk that I thought I now had the skills to replicate. The sketch below shows the initial idea – starting with the lid of an imperial container, with a general metal panel based onto the side of it. A pipe leaning up for some vertical changes, and some mesh. The metal panel will have some additional panels riveted on, including a grill, and then the warband glyph. The whole item would be targeted at 1 inch or so tall, and 2 inches wide – rough dimensions that would work with either terrain feature that it might be attached to.

After a few hours wrestling with the computer, it turned out that my 4 hours of YouTube had provided me with enough skills to get started.

And the item printed relatively well. Note that in the picture below the glyph is from the previous print, just resting on top where it would get glued in due course.

And here is an image of the item next to the terrain that inspired the shapes and features. You can see the imperial container lid above the piece, and the mesh sections to the side.

Items/thought/reflections are:
- The container lid came out well. The more rounder and less gothic look is my inability to figure out the drawing style before I got bored and moved on.
- The container lid could benefit from the raised sections instead of just the depressions. I didn’t notice that until much later.
- The grating was harder than I expected because I put the plane at an angle. I gave up on getting it right, and the print reflects.
- The mesh is too fine. Holes and spaces need to be bigger to match the GW scale.
- The pipe is too basic – but that was really giving me trouble at the end. Overall, I don’t think I assembled the model very well, as they are all extrusions off each other rather than individual components connected together (I don’t know how to do that yet)
- The whole piece is very flat. Everything is extruded in specific 1mm heights with respect the to back plane of the model. Some tilts would add realism compared to a series of flat faces.
One final image of the piece temporarily attached to the buildings:

3D printing tests
So, to kick off the 3D printing experience, I went to Thingyverse and found a few items to try out and see how everything worked. First was a crater, which printed nicely, but is a completely different scale to the citadel ones that I already have.

Next was a more hcallenging model. This item on Thingyverse is a brilliant representation of a crashed dreadnaught. It printed in two pieces (engine block seperate), and then it was time to paint something for the first time in many years!


The quality certainly isn’t up there, but for a terrain piece this well and truly exceeds scratch builds. From 2-3 foot away, it’s almost indistinguishable from an actual dreadnaught.
Now that the initial tests are out of the way and I know how to turn an stl into a piece of plastic in a reliable maner, it’s now on to learning how to make my own things.
Back again – Kill Team time

Well, ,after another long break, life and circumstance apparently want me to get back to this hobby again.
So, like normal, I’m going to restart myself with a targeted project – the Kill Team Starter set, and some associated side projects. I came across an exceptionally good deal on the 3D printer, so I’m also going to try to get into that, in particular in support of the Kill Team project. A good friend of mine who has been procrastinating on hobby almost as long as me is keen to get a Spec Ops campaign going, and now the kids are teenagers they think its a good idea to get involved as well (we’ll see how long that lasts).
Amallyn Shadowguide, Part 3
I spent some more time on Amallyn, before moving on to basecoat most of the rest of the heroes.
I did the eyes with Pallid Wych Flesh, then Teclis blue, then Abbadon Black. The skin was Cadian Fleshtone, then Kislev Flesh, and a final highlight of 1:1 Kislev: Pallid Wych Flesh.
I basecoated the leather in Dryad Bark, then washed it with Agrax Earthshade. I did a bit more work on tidying up the Ulthuan Gray on the armour and a few other basecoats in order to see what I have to do next.

I also base-coated a few of the other heroes as well (well, mostly base-coated).
Amallyn Shadowguide Part 2
I worked on the insides of the robes. I didn’t have all the colours from the web tutorial, so I improvised.
Layered with 2:1 Moot Green:Nurgling Green, then washed it (and the leather) with Agra’s Earthsade, then layered again with 2:1 Moot:Nurgling, then highlighted with 1:1 Moot:Nurgling before a final highlight of Nurgling Green.
I did a bit of work on the armour, firstly tidying up the basecoats before a later or Ulthuan Gray. Still needs another layer of Ulthuan to clean up the colour, and some of the fiddle bits near other colours aren’t yet started.
Overall, continuing well though.

